Here’s my compass needlepoint project finished and framed!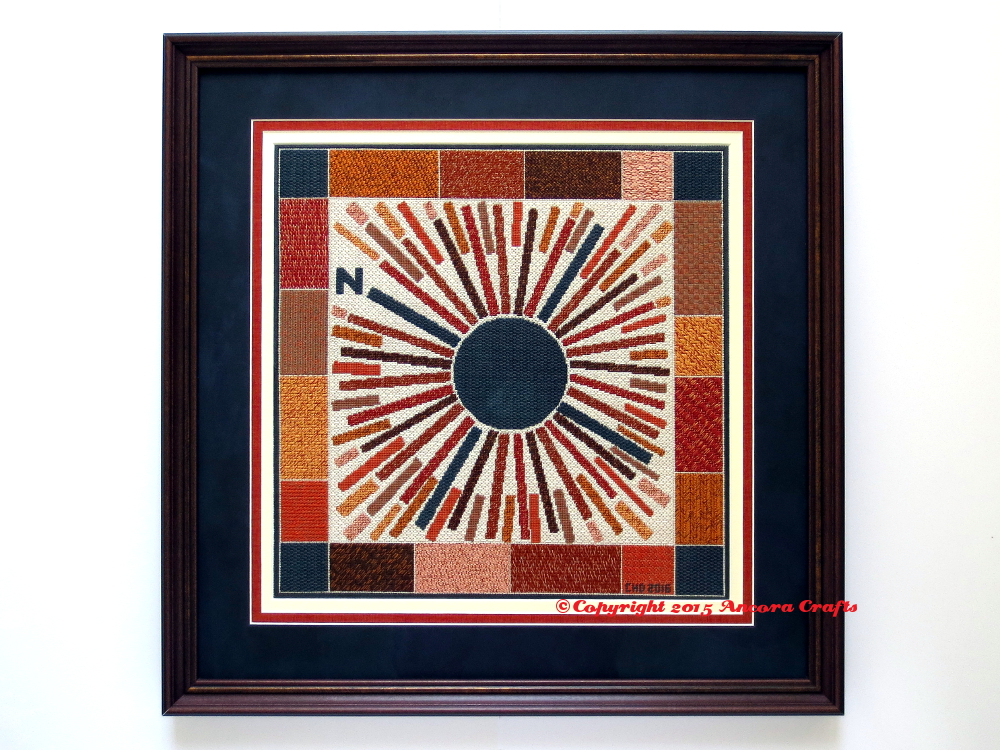
I’m absolutely thrilled with the result. It’s just gorgeous, and as good or better than I even imagined. I designed this compass rose project in 2013, hoping it would be a quicker project than my earlier Ancora Imparo needlepoint. However, once I got into the design of this compass, I realized that the number of stitches necessary would be roughly the same as in Ancora Imparo. So much for being quicker!
I started stitching this compass project in January 2014 and finished up in February 2016. It didn’t take up all of my crafting time during that period as I was working on other, mostly cross stitch, projects concurrently. This compass needlepoint even crossed the Atlantic Ocean twice! I have vivid memories of working on this project while sitting on the patio of a house in the mountains of Asturias, Spain.
This project was inspired while we were traveling in Europe; it is based on a compass rose made of tile pieces on the patio of the charming Cuq-en-Terrasses hotel in France. The hotel is in the countryside near Toulouse, and it’s one of our favorite places to stay in the world.
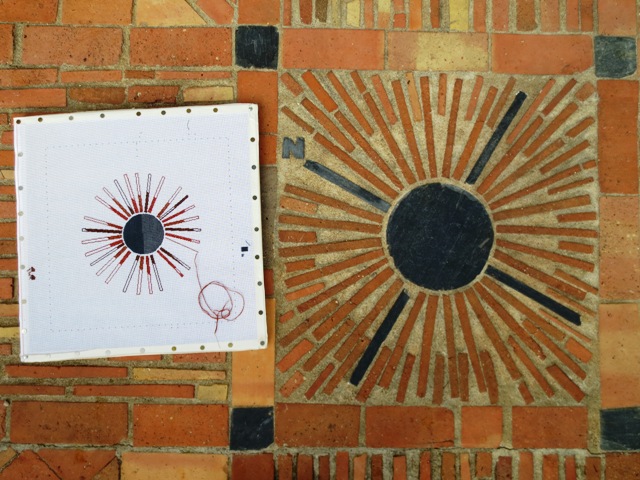 Here you can see the needlepoint early in it’s execution, next to it’s model.
You can see that I made the project a little more colorful than the original, but stayed true to it’s earth tones. At that point I had outlined and partially filled in nearly all of the first row of tiles except for the four gray tiles of the primary compass directions (north, south, east, west).
One of the reasons I stitched the primary direction tiles last is that, as I did in the center circle, I wanted to use the double stitch in that area. As I discovered through this project, double stitch works great on a square area; however, in an irregular shape, it can turn into quite a challenge. To conquer that challenge, I created a helpful tutorial on how to tackle the double stitch.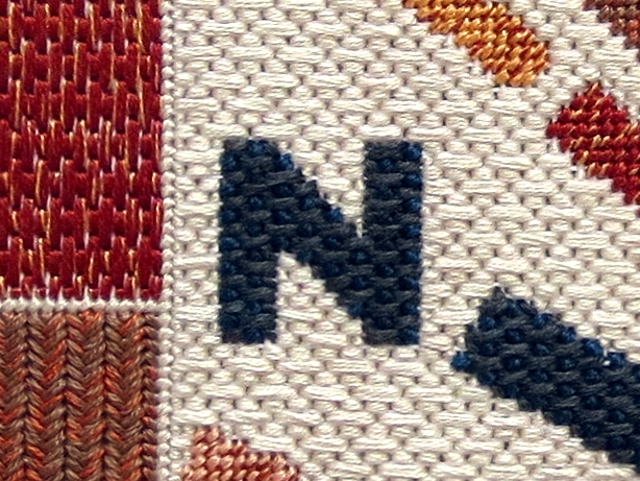
Above, you can see the two colors I used in the double stitch. The long cross stitches are in dark grey, while the short cross stitches are in a dark grey-blue. When I was choosing colors for this project, I thought the blue would make a nice visual compliment to all the earth tones without contrasting too much.
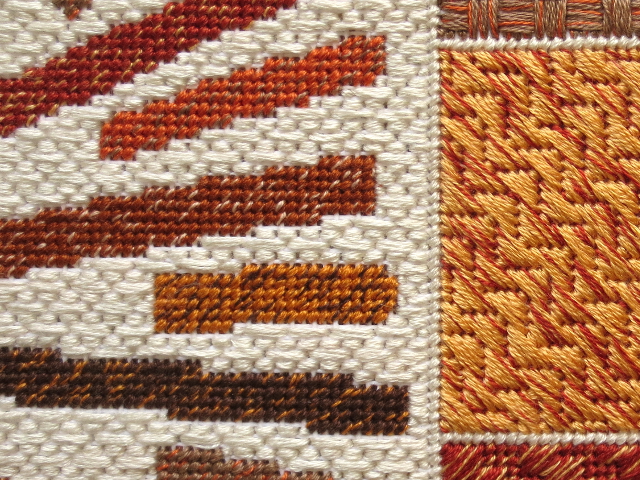 Above you can see that with the all of the brown flosses, I slightly blended the colors, mixing 5 strands of one color with one strand of a contrasting color. I did this to better represent the speckled color and texture of the original tiles and to add a little visual interest.
You can also see the Tent stitch used in the radiating tiles of the center square, the Hungarian stitch used in the background of the center square, and three of the stitches used in the border blocks. In total, I used 20 different needlepoint stitches. The reference book I used for the stitches is an old favorite of mine, 101 Needlepoint Stitches and How to Use Them by Hope Hanley.
To read more about the execution of this compass needlepoint, here are my posts over time: Getting Started, Update 1, Update 2, and Update 3.
The pattern for this project is now available in my Etsy shop, and it could also be made into a custom needlepoint kit as well. While I love the earth tones in the stitched example, I think this project would look great in lots of color combinations. Please contact me if you would be interested in seeing some other color options with this project.
My husband and I may not be able to spend all our time at Cuq-en-Terrasses, but now we have this compass needlepoint project as a beautiful reminder of our wonderful stays there. There are also a few more of their patio tile patterns that would make great needlepoint projects… stay tuned!