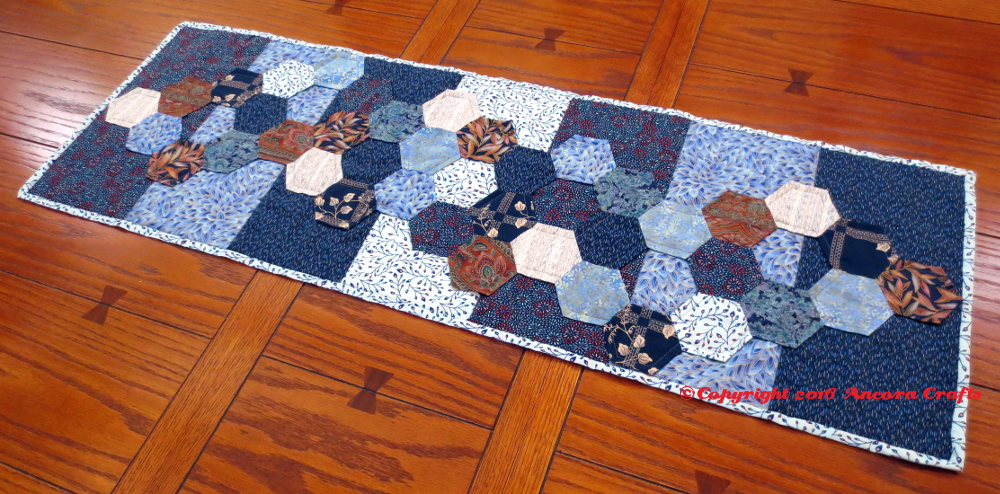
This hexagon table runner project was inspired by a number of things.
First, I was just itching to play with my fabric stash. After several years of working solely on cross stitch and needlepoint projects, I wanted to play with the colors and prints of fabric again. I do love my stitching projects, but my heart really sings when I see fabrics juxtaposed in interesting combinations.
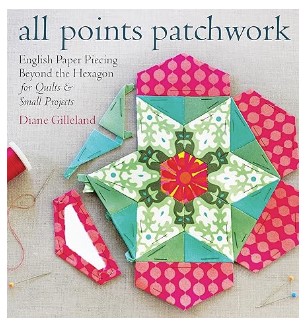 Second, I had never tried English paper piecing (EPP) before. When my friend Diane of Craftypod released her latest book, All Points Patchwork, I was intrigued by the technique. I was too busy with other projects to participate in any of the EPP blog hops at the time of the release, but working with EPP had been lingering in the back of my mind ever since.
Third, I wanted a table runner! I thought that a pair of my wood file cabinets could use a splash of color on top. With those three inspirations in mind, I set out to make my own EPP hexagon table runner.
Before I go further, I should explain that I had not yet purchased All Points Patchwork when I created this project, and I sure wish I would have. It is a treasure trove of all things EPP: tools, techniques, tips for creating with each shape, and design ideas. Further into this tutorial, I’ll share some things I would have done differently if I had read the book first.
Design
The design of this project was adapted from this “Modern Hexie Table Runner” project by Laura Hartrich. I liked her use of multiple background fabrics and a hexie layout that created gaps in the pattern to reveal the background. Her project is great; however, where her hexie layout was asymmetrical, I wanted to create a symmetrical arrangement. And where she used a simple applique technique to attach her hexies individually to the background, I was wanting the full EPP experience to join my hexagons together before appliqueing them. 
I knew I wanted to use 1-1/2 inch hexagons so that this first attempt at EPP wouldn’t become too hard to manage. I also knew that the top of my two file cabinets measured just under 43 by 19 inches, and I didn’t want this project to overlap the edges of the cabinets at all. After some experimentation I ended up with this layout:

1-1/2 inch hexagons “on their sides” as shown (rather than arranging the points at top and bottom) measure 2-5/8 inches high, so 5 rows add up to a total of 13-1/8 inches. A single 1-1/2 inch hexie measures 3 inches wide; however, 3/4 inch of the width of the NEXT hexie overlaps with the first hexie. Therefore, every column of hexies adds only 2-1/4 inches of width to the project. The seventeen columns of hexies shown here adds up to (3″ + 16 x 2-1/4″) 39 inches.
IF I HAD READ THE BOOK FIRST, I would have used hexagon graph paper from the beginning. Regular graph paper just didn’t get the spacing of the hexagons correct. This led to quite a mess that I didn’t catch until much later in the project when I removed the templates behind the hexies. I had to take out a bunch of seams, re-insert templates behind eight of the hexagons, re-position and re-attach five hexagons, cut all new pieces of background fabric, and I was left with barely enough backing fabric to do a wrap-around binding for the quilt. Lesson learned: use hexagon graph paper!
Fabrics
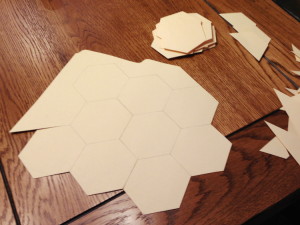
 [Note: this photo shows the hexies BEFORE I sewed them together!]
The design was pretty well established so then I scoured my fabric stash, looking for candidates. I’ve been on a light blue kick for a little while now so shades of blue feature prominently. I also knew that this runner would be on a stained wood surface, so I wanted a few browns in the mix. From my collection, I ended up using fabrics 1, 2, 4, 5, 8, and 9. Then it was off to my local fabric shop to find prints for the background and the backing. There I found fabrics 3, 6, 7, and 10. I think it’s a good and slightly funky mix!
Background
I used fabrics 3, 6, 7, and 10 in the pattern you see below (10,3,7,6,10,3,7). I knew that 6 was going to be my backing and binding fabric, so I used only one piece of it in the center as opposed to the two pieces each of 3, 7, and 10.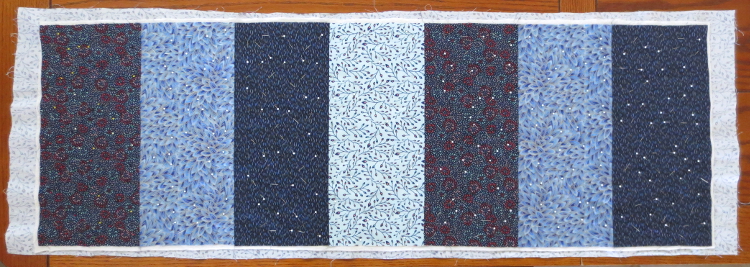
The background pieces were cut at 13-1/2 inches tall by 6-1/2 inches wide. That left enough for a 3/8 inch seam allowance between the pieces and an overall usable width of just over 40 inches. It turns out that I needed every bit of that 40 inches as the combined width of the hexies sewn together was 40 inches, one inch wider than the 39 inches I calculated. I think next time, I’d cut the pieces 14 inches tall by 6-3/4 inches wide, just to be safe.
I knew I was going to applique on the edge of the hexies and I knew there was some probable un-quilted space between the hexies and the edge of the runner. I also knew I wanted to anchor down the background a bit before I appliqued the hexagons. So at this point I layered my batting and backing fabric, pinned the layers (you can just see the white pin heads in the photo above), and quilted in the ditch between the seven pieces.
Templates
 To create my own hexagon templates, I used Incompetech’s graph paper generator to make an original template on normal office paper. I cut out a hexagon and then traced it repeatedly onto manila file folders to make the templates. This tracing probably made the hexies a smidgen larger than they should have been, and this may be why my sewn hexies together measured 40 inches wide rather than the 39 I calculated. IF I HAD READ THE BOOK FIRST, I may have followed Diane’s recommendation that beginners use precut templates; however, with so few hexagons necessary for this project, I might still have created my own. Next time, I would make them with much greater precision, possibly printing the Incompetech hexagons directly onto the file folders.
Hexagons
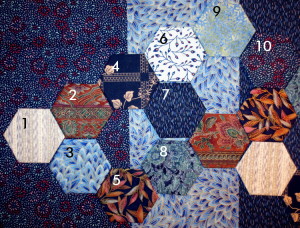 The layout calls for 38 hexagons. Although I made some (11) hexies from the background fabrics, I made the remaining 27 from the other fabrics. Here’s the breakdown:
- Fabric 1: 5
- Fabric 2: 4
- Fabric 3: 3
- Fabric 4: 5
- Fabric 5: 4
- Fabric 6: 2
- Fabric 7: 3
- Fabric 8: 4
- Fabric 9: 5
- Fabric 10: 3
Fortunately, even before Diane published her EPP book, she uploaded videos to YouTube that perfectly explain how to create hexies, sew them together, and then remove the paper templates.
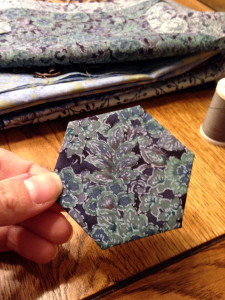 After watching these videos, I started basting my own hexies with ease! Once the fabric was cut, it took me less than three minutes to baste a hexie. I couldn’t believe it was so easy, and I felt silly for not having tried EPP before. At right is a photo of the first hexagon I had ever basted – it was a proud moment!
After all the hexies were basted, I laid them out on the background and played with their arrangement. I didn’t want any of the fabrics to overlap themselves in the background, and I wanted to balance out the location of the dark and light fabrics. This was the result: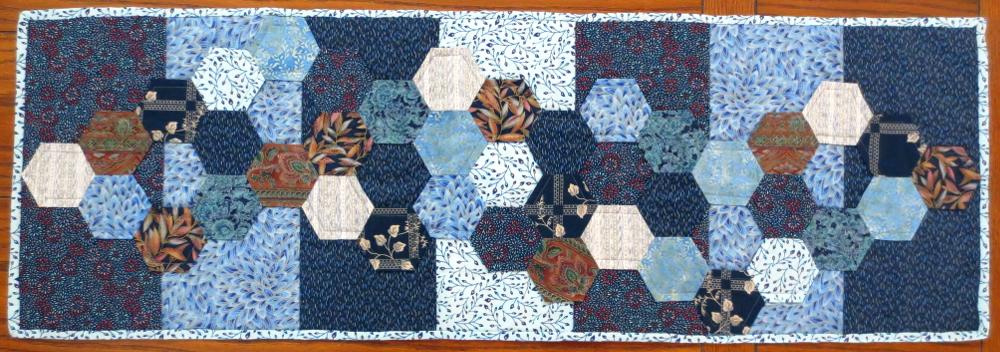
From here, I sewed the hexies together using Diane’s video instructions. After a good steam pressing, I removed the templates and was ready to applique the big piece of EPP to the background.
Applique
I took a great deal of care to lay out the EPP on the background: noticing where the pieces in a column lined up with the background seams, making sure that the top and bottom edges of the pieces were horizontal, and ensuring that the extreme left and right points were centered vertically. I then pinned the everlasting crud out of the EPP to make sure that it wouldn’t shift as I appliqued.
I first sewed around the seven gaps in the EPP and then sewed down the entire outline in one long take (see the red lines in the figure below).
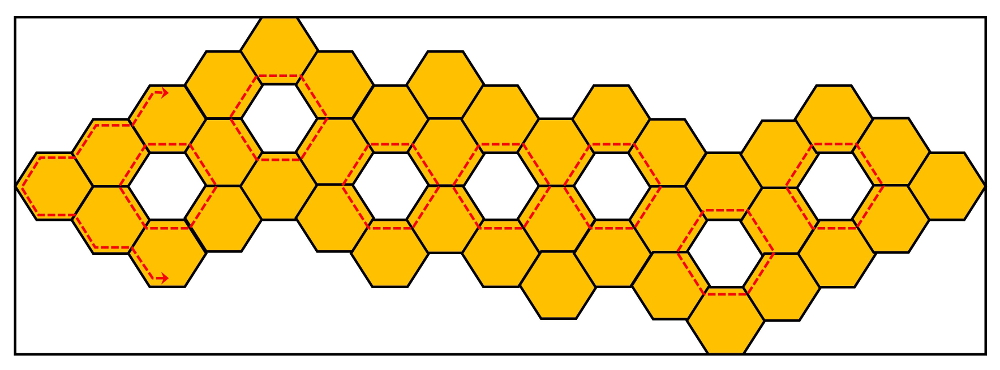
IF I HAD READ THE BOOK FIRST, I would have appliqued about 1/8 inch from the edge. As I did it, I appliqued about 5/8 inch, and I’m seriously considering whether I should resew it at the recommended 1/8 inch. The table runner looks fine as is, but if I were to wash it, some of the fabric on the back of the hexies might slip out and that would be a hassle to fix. I also think it would look a little better with the 1/8 inch distance when viewed up close.
I cleaned up all my thread ends and then buried the tails between the layers of the quilt.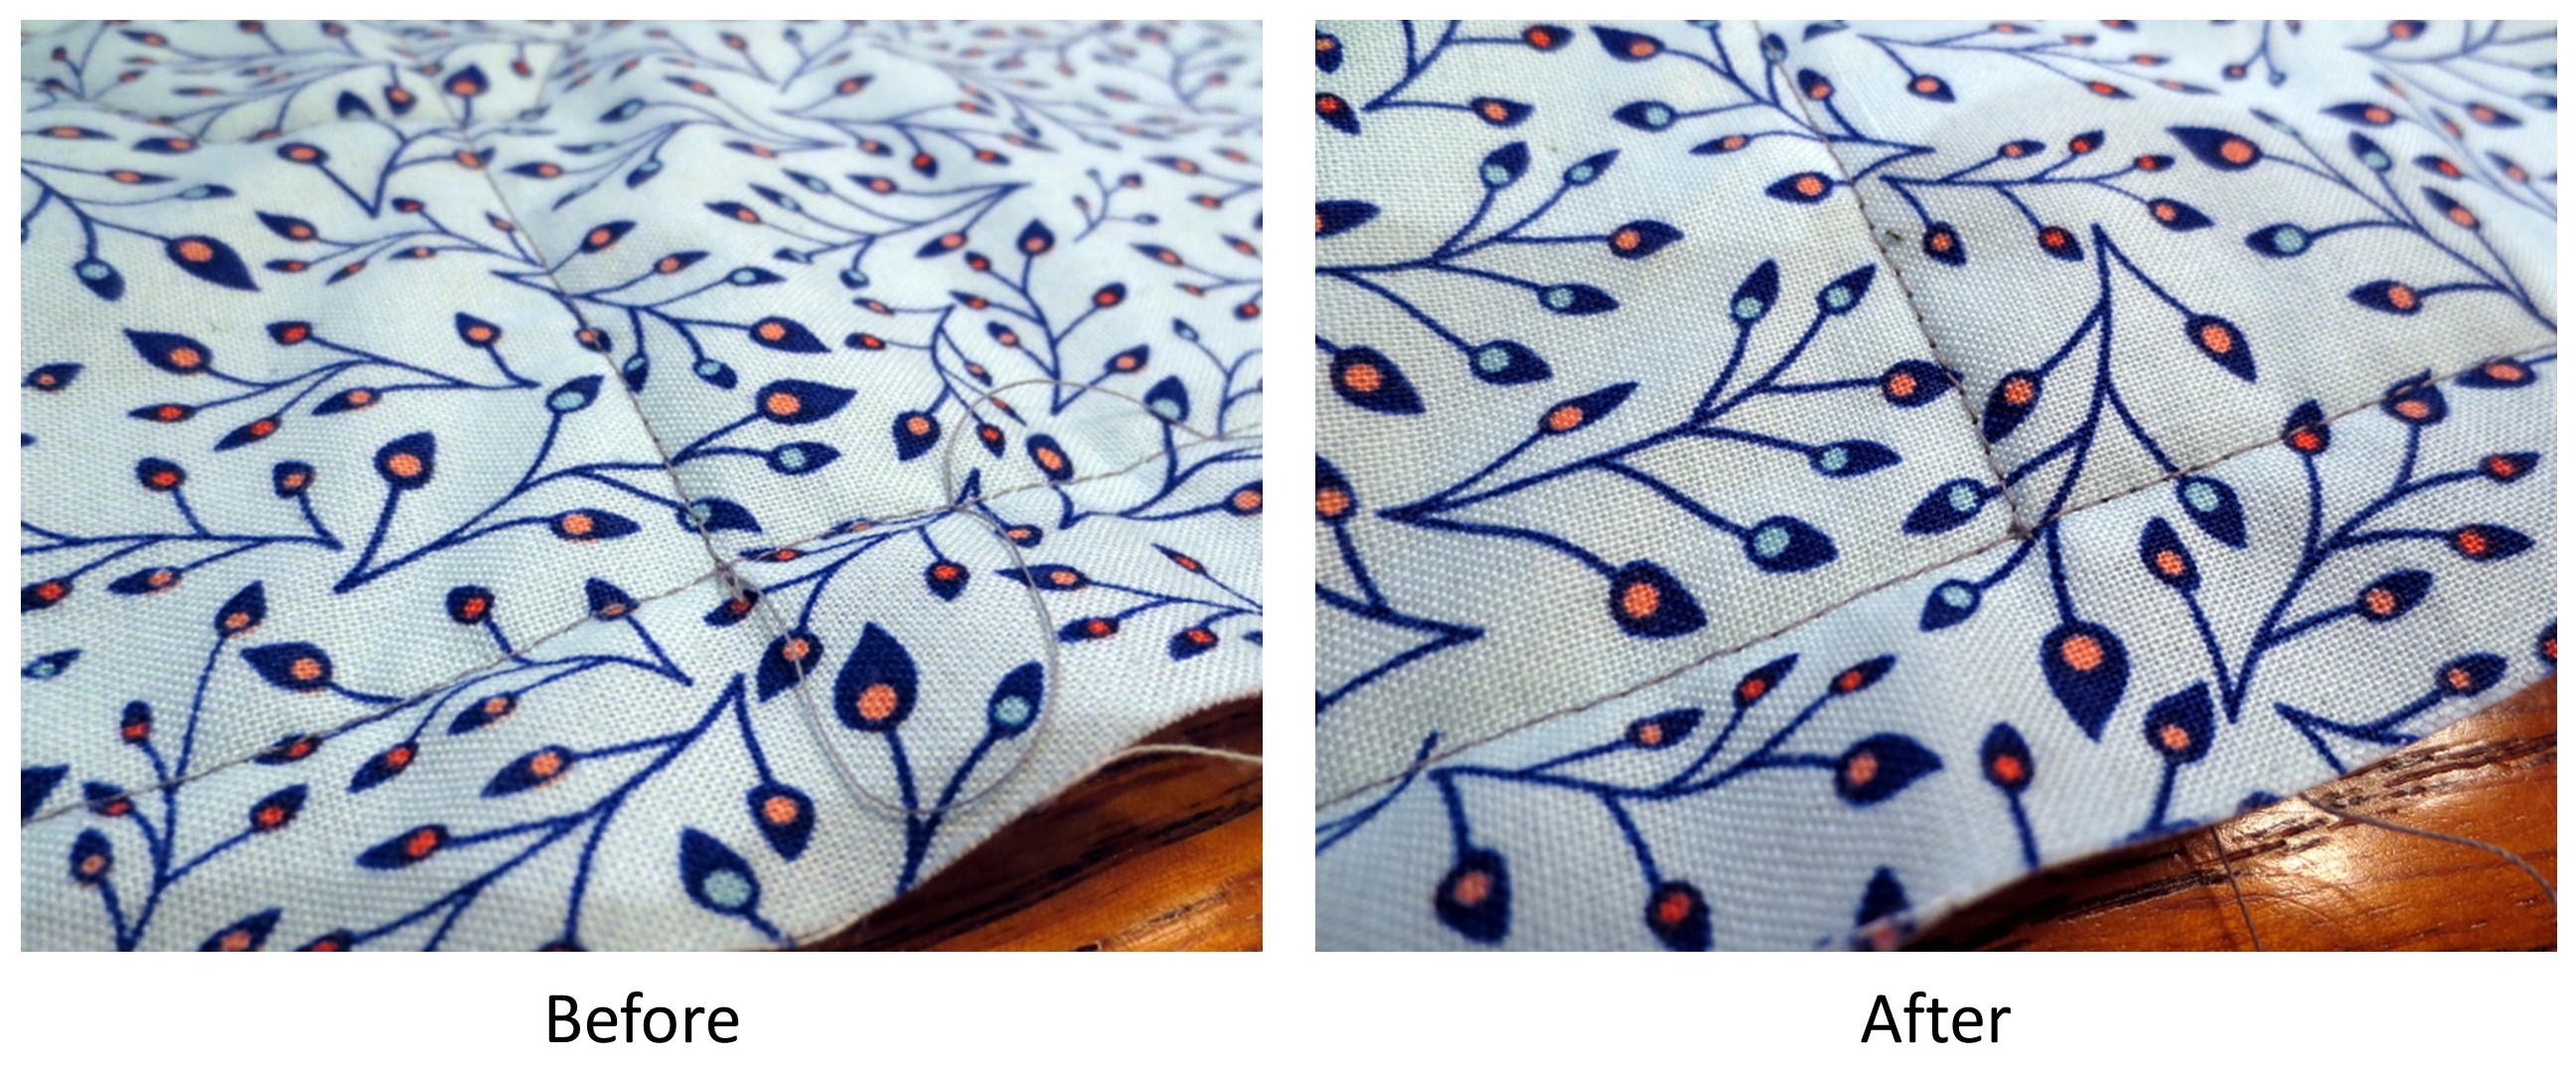
Binding
Last, I did a wrap-around binding (where the backing fabric becomes the binding) with a blind stitched finish on top. Unfortunately, I didn’t leave myself much fabric to do the wrap around, but I did manage, barely, to make it work. Just don’t look too closely at those corners, please!
Here is my new table runner in it’s new habitat, on top of its file cabinets, mere moments before it was filled with all the debris of modern life.
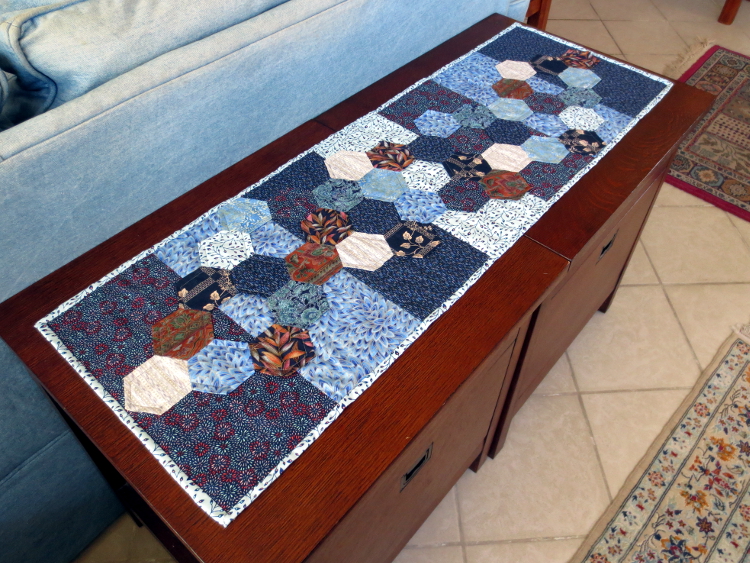
I love it, and I’m looking forward to making more in the future. Maybe some holiday-themed hexagon table runner projects will follow!