I’m happy to share more progress on my compass needlepoint project!
 On the last update, I had outlined and partially filled in all of the first ring of radiating tiles and had completed the double stitch in the primary direction (NSEW) tiles.
After finishing up our travels last summer, I was able to start working on this project again, and I’m SO pleased with the progress thus far:
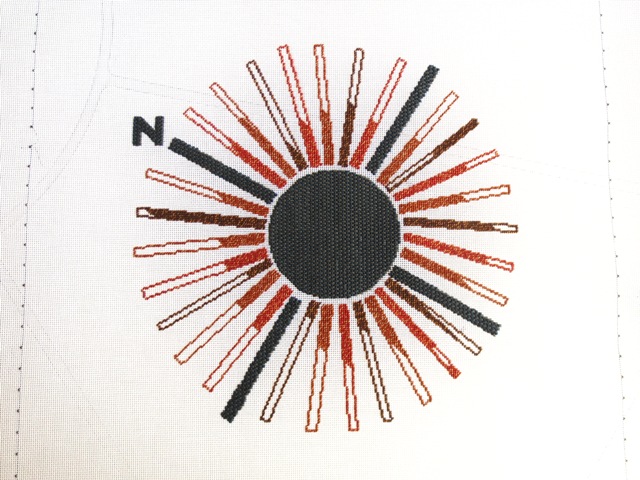
All of the radiating tiles are complete! Here you can see the first, innermost ring in the three darkest colors, the second ring in three medium colors, and the third, outermost ring in the two lightest colors.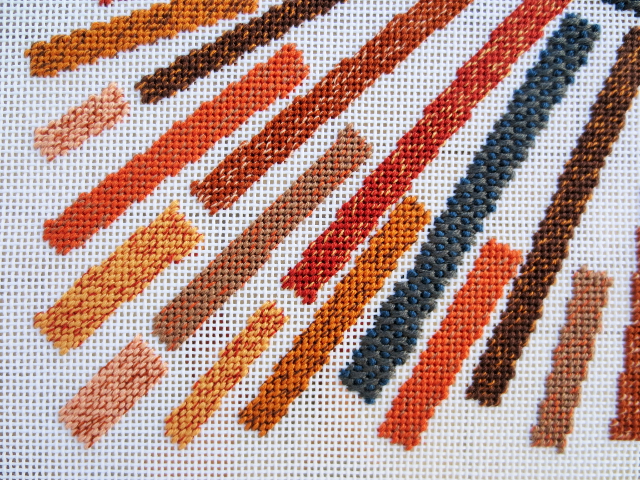
Now you can see all of the colors that will be used in this project. There is the dark grey and dark greyish blue color of the primary direction tiles. Then there are the chocolate brown, rusty brown, and muddy brown of the first ring. The second ring has lighter shades of the chocolate brown and the rusty brown plus a dark gold. The third ring has a lighter gold color and a very light rust, nearly peach color.
You can also see that I have slightly blended the colors, mixing 5 strands of the main colors with one strand of contrasting colors. I did this to better represent the speckled color and texture of the original tiles and to add a little visual interest. I must admit that this looks better than I had originally imagined – it’s really wonderful in this project.
The next step in this compass needlepoint is to define the edge of this center part of the project and the surrounding border tiles with what I’ll call a “grout line.” After that, I’ll fill in the border tiles using some fun and interesting needlepoint stitches, and then I’ll fill in the entire background of this center section. I can’t wait to see how this tribute to one of our favorite hotels, Cuq-en-Terrasses, turns out – stay tuned!
Update: Progress Update 3 is here!