I’ve created this glow in the dark thread review as I was genuinely curious about two things: how to use the Kreinik’s line of glow in the dark (GITD) threads and the difference between the Kreinik and DMC’s E940 GITD floss. I carry the DMC floss in my Etsy shop and it has proved to be very popular. However, DMC has only the one color of GITD floss where Kreinik has seven colors and eight different sizes/types of thread.
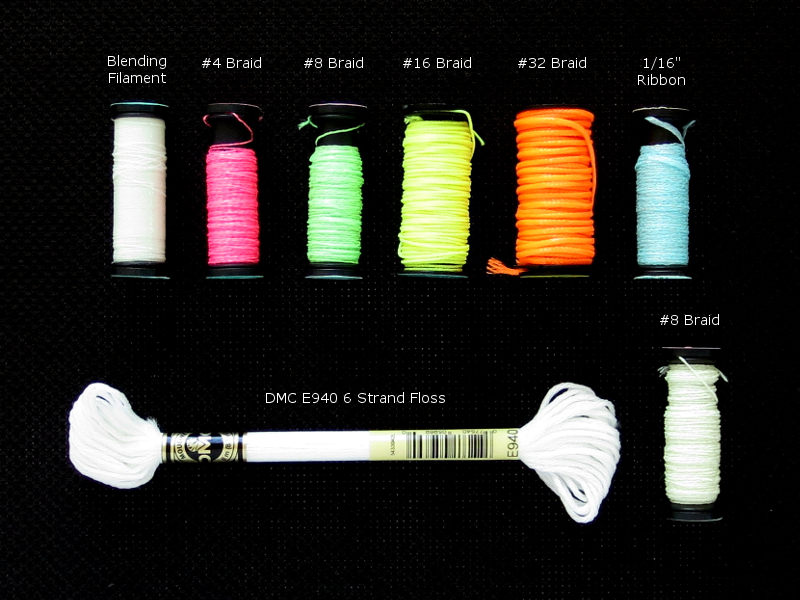
Clockwise from top left you see Kreinik Blending Filament in Grapefruit, #4 Braid in Watermelon, #8 Braid in Lime, #16 Braid in Lemon Lime, #32 Braid in Tangerine, 1/16″ Ribbon in Blueberry, #8 Braid in Grapefruit, and the DMC E940 floss.
Kreinik also has #12 Braid, #24 Braid, and a 1/8″ Ribbon, but I decided against trying them out in lieu of the 4-8-16-32 progression you see above. Kreinik also has a seventh color, Grape, but it is only available in 1/16″ and 1/8″ Ribbons.
I used the Kreinik threads in cross stitch on 18 and 14 count Aida fabrics. I also used the Kreinik threads in tent or basketweave stitch on 18 and 14 count needlepoint canvases and in 7 count plastic canvas. I didn’t necessarily use every thread on every canvas – as you’ll see below, some of the combinations of thread and fabric were impractical.
With that in mind, let’s see how these Kreinik threads stitched up on a variety of cross stitch fabrics and needlepoint canvases. Let’s get started with the 18 count Aida…
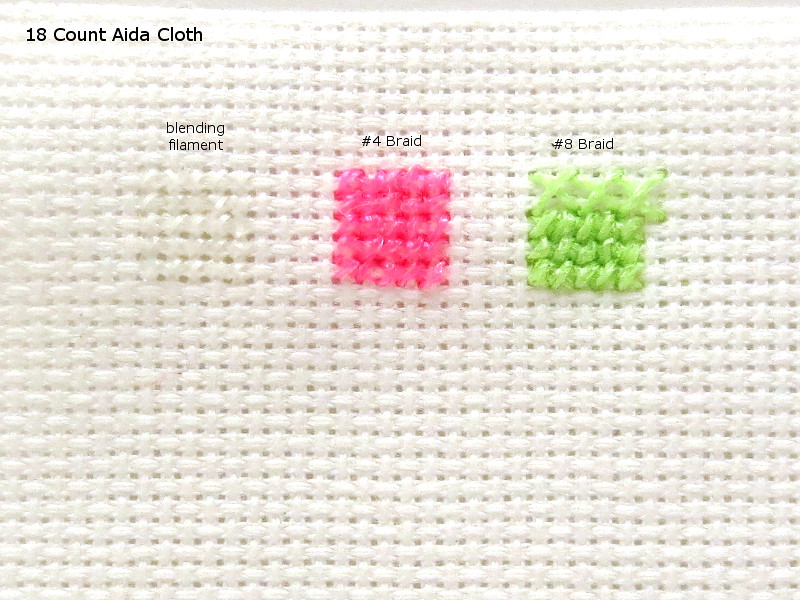
The Blending Filament is interesting stuff – it’s a bit like stitching with very fine fishing line. It is composed of lots of extremely thin filaments that love to fray at the ends of the strand. I was able to thread it in a #26 tapestry needle pretty well. Using this color filament on white material took supreme concentration to make sure that all the stitches were done correctly. You can barely tell that the filament is there – it just adds a little plastic-y shimmer to the fabric.
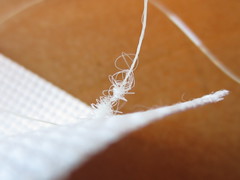
The only issue I had with the Blending Filament itself on this 18 count Aida was that the strand frayed pretty badly while I was stitching. This didn’t happen with the filament as prominently on any of the other fabrics or canvases I tested. Below left you see the back of the Aida, and on the right you see the front. Keep in mind this filament was not necessarily designed to be used like this, so this is not a big deal. I just wouldn’t recommend using it in this exact same way.
The Watermelon pink #4 Braid provided great coverage on this 18 count Aida, where the Lime green #8 Braid was a little too heavy (you’ll see how I made a few cross stitches crossing two at top just for fun). Using these Braids is like stitching with a heavy waxed dental floss. Rather than form knots, the threads tend to kink like a garden hose and they like to fray at the ends of the strand. I could not thread either Braid into my #26 tapestry needle. Unlike cotton floss that can “squish” into a needle eye, the #4, #8, and #16 Braids have no ability to compress whatsoever and needles with bigger eyes are necessary.
Stitching with the #4 and #8 plastic Braids produces an interesting texture on the fabric that I’ll call “crunchy.” You’re stitching with plastic, so “crunchy” is to be expected! It’s just different than the more soft and pillowy stitches that result from using cotton and wool.
Ah! But how do they glow? Well, they glow great!
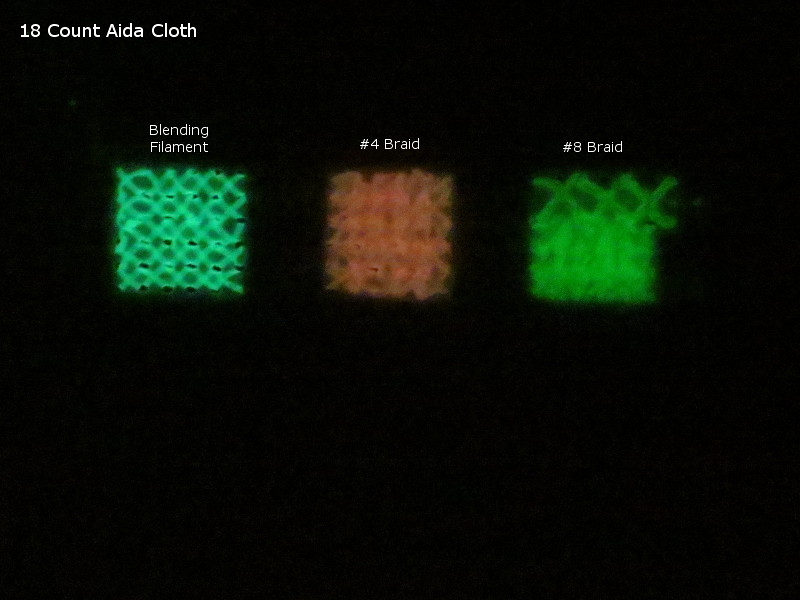
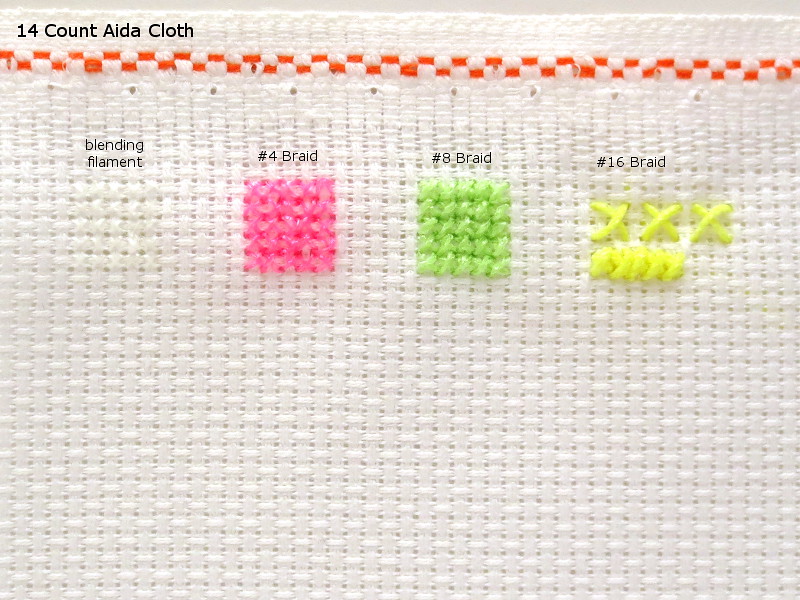
You can see the light coverage of the Blending Filament, the good coverage of the #4 Braid, and the lumpy coverage of the #8 Braid.
Again, you can hardly see the Blending Filament. The #4 Braid has some coverage, but the #8 Braid is about perfect on this 14 count Aida. I tried a little of the Lemon Lime #16 Braid, but it proved to be just too thick, distorting the fabric and holes pretty badly.
Stitching with the #16 Braid is like stitching with a very tiny paracord, so it doesn’t kink up quite like the #4 and #8 Braids. Finding a needle with an eye big enough to accommodate this Braid that won’t distort the fabric can be tough. And in the dark…
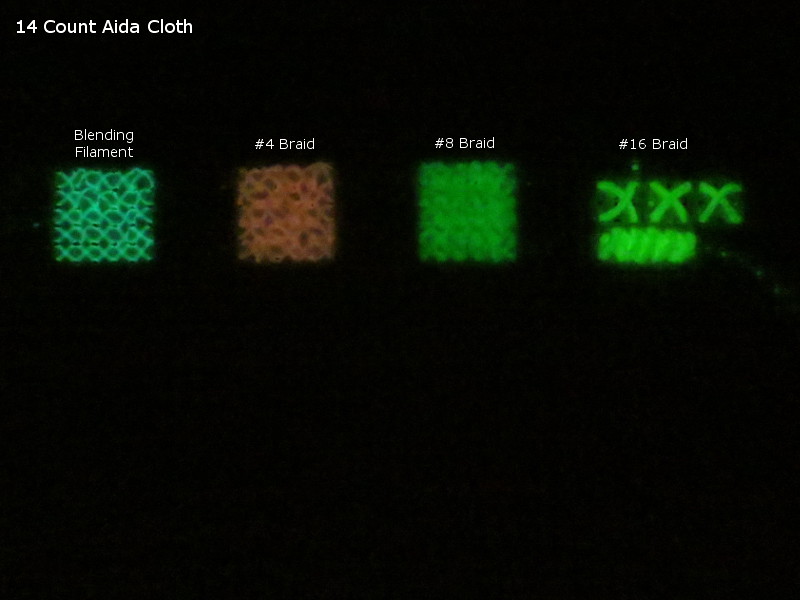
the results are similar. The Blending Filament and the #4 Braid don’t quite cover the Aida effectively. The #8 Braid is about perfect, and the #16 Braid looks lumpy. Also, there’s not much difference in color between the Lime #8 and the Lemon-Lime #16 Braids.
On to the needlepoint canvases! First up, 18 count…
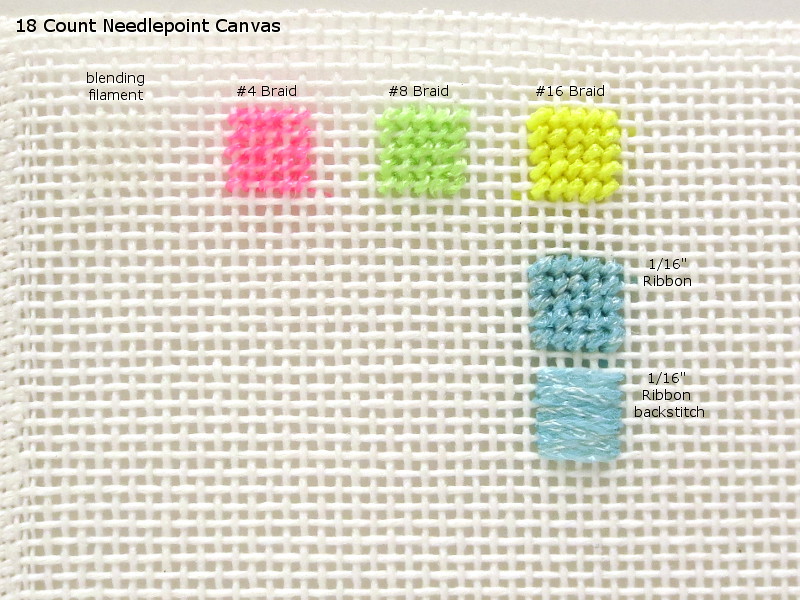
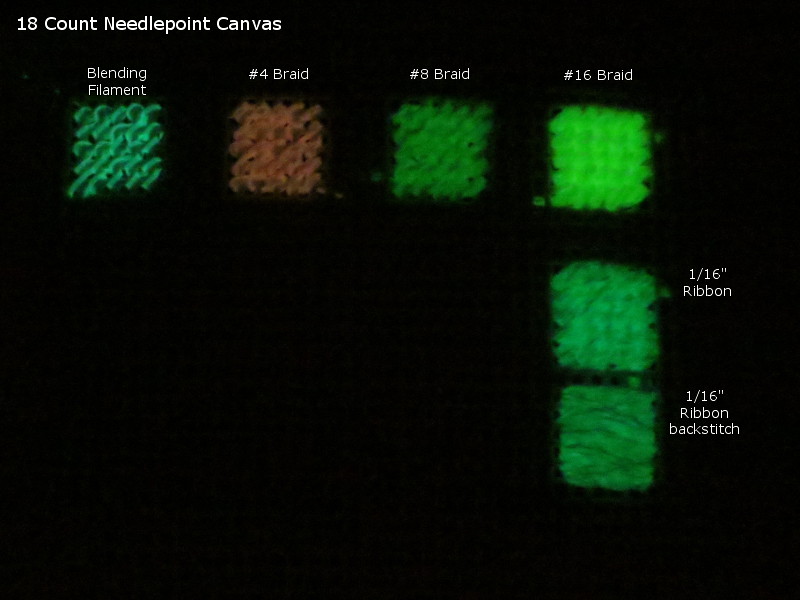
In tent stitch, the Blending Filament is hardly visible, the #4 Braid doesn’t quite cover, the #8 Braid gives a little more cover, but the #16 Braid is the one that effectively fills in the canvas.
Here I used the 1/16″ Ribbon in both tent stitch and backstich. The ribbon is flat, so it is quite easy to thread through a needle and it doesn’t tend to fray much. It does require constant untwisting and manipulation to keep flat. In tent stitch, it covers well but looks a little crowded. Ah, but in backstitch it really looks great! You can easily see the light color and the shimmery texture. The slight difference in the brightness between the tent stitch and the backstitch is true-to-life – the tent stitched portion really is a bit darker than it’s backstitched counterpart.
the results are similar. The Blending Filament and #4 Braid are definitely visible but don’t cover at all, the #8 Braid is better, but the #16 Braid and the 1/16″ Ribbon cover well. The ribbon in tent stitch glows a little brighter than the backstitched section, but it’s not a huge difference. There’s also not much difference in color between the Lime #8, the Lemon Lime #16, and the Blueberry 1/16″ ribbon, whereas the Blending Filament in Grapefruit definitely looks more blueish. Interesting!
In 14 count needlepoint canvas,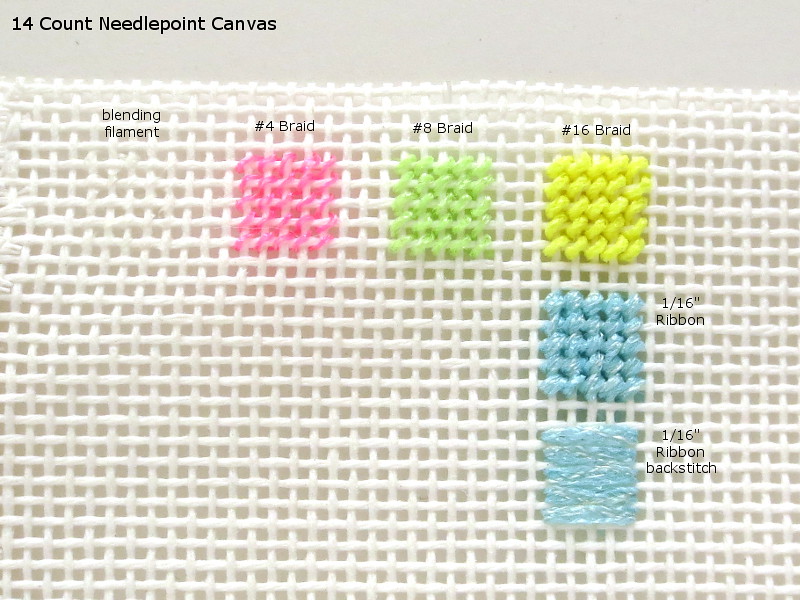
almost identical results as the 18 point canvas. The Blending Filament, #4 Braid, and #8 Braid aren’t enough to cover, while the #16 Braid and the 1/16 Ribbon covers nicely. The Ribbon looks better and less crowded in tent stitch than it did on the 18 count canvas, and again the backstitch looks nice.
In the dark, again similar results as the 18 point canvas:
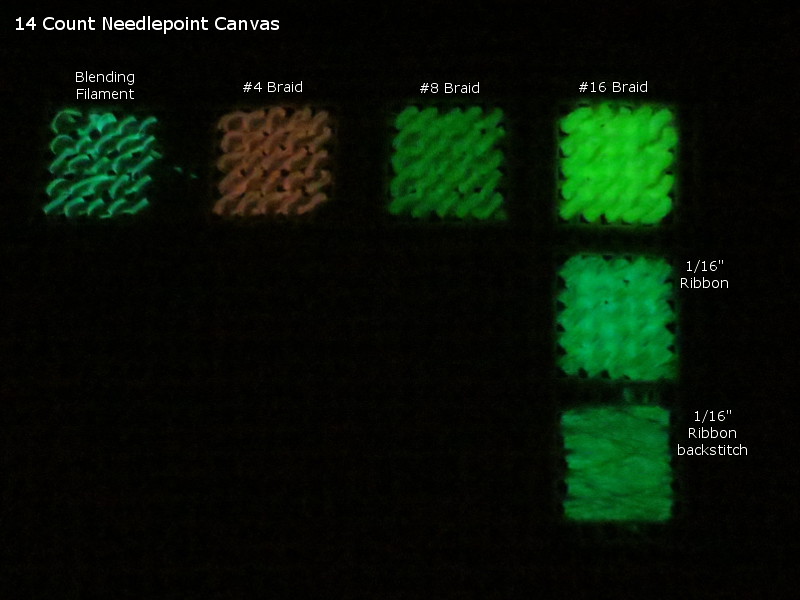
Nice coverage by the #16 Braid and the 1/16″ Ribbon.
The last material I tried was 7 count plastic canvas.
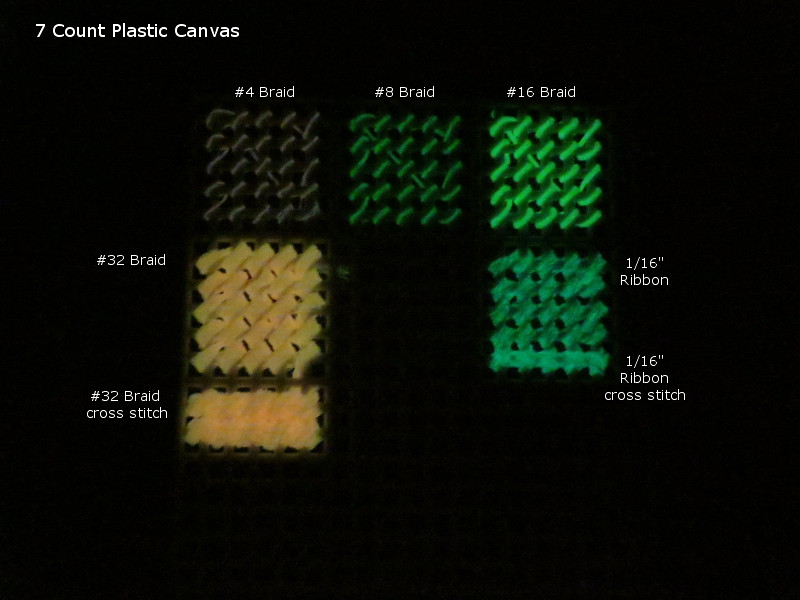
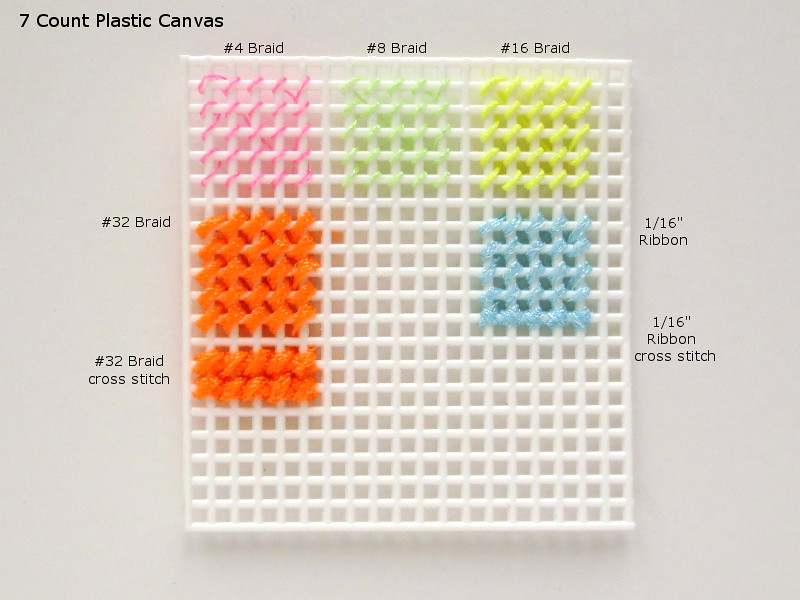 I started with the #4 Braid, and here you can see that it, the #8 Braid, the #16 Braid and the 1/16″ Ribbon don’t cover the canvas at all. The Ribbon in cross stitch is enough to cover the plastic canvas grid but leaves the holes completely open.
Here I tried the #32 Braid for the first time. This braid, unlike it’s smaller siblings, does flatten out. It seems to be somewhat hollow in the middle – the closest comparison I can offer is that it’s like stitching with a tiny Chinese finger trap – and it has a bit of spongy give to it. Like using the ribbon, it does require some manipulation to get it to lay flat. Even the #32 Braid in tent stitch doesn’t fully fill all of the holes in the canvas (the photo shows the coverage as being a little more generous than it is in real life). However, the #32 Braid in cross stitch completely covers the canvas and fills the holes.
the #4 and #8 Braids are barely visible, the #16 braid and 1/16″ ribbon are bright but don’t cover well. The #32 Braid glows great, but the full coverage is only in cross stitch. Here you can see better the difference between the color of the Blueberry Ribbon and the Lemon Lime #16 Braid, and the Tangerine orange of the #32 Braid is clear.
Thus far, this review has been all about using the Kreinik threads. Now here’s how the DMC floss compares with it’s closest Kreinik counterpart.
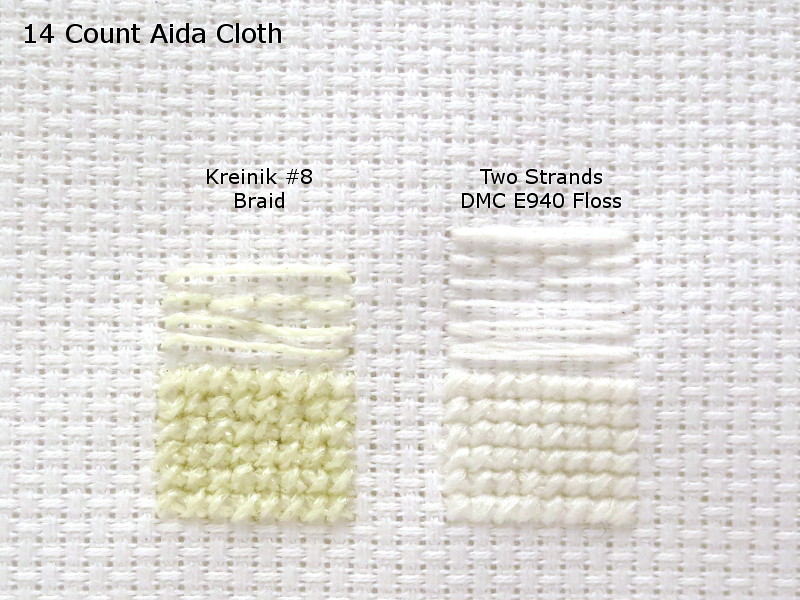
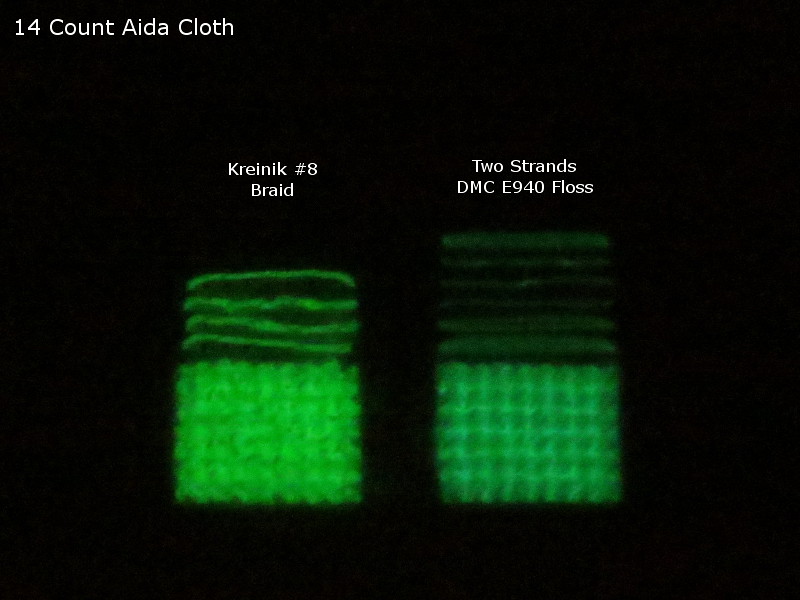
On the left is Kreinik #8 Brain in Grapefruit, and on the right is two strands of DMC E940 Floss. I chose the #8 Braid as it provided the best coverage on 14 count aida, and I chose Grapefruit as it was the closest in color to the near white of the E940.
On the top, I did a few backstitches of varying lengths, and then I stitched six rows of cross stitch. It’s pretty clear to see that when it comes to behaving like regular six strand cotton embroidery floss, DMC has a clear advantage. It is soft and pillowy, whereas the Kreinik Braid has the “crunchy” texture I talked of above. The Kreinik produces a noticeably thicker and more sparkly stitch rather than the lower profile and matte finish of the DMC. The backstitches in DMC lie flat and behave well, and the Kreinik backstitches are a little more unruly.
They both glow well, but I’ll give the edge to the Kreinik, especially when it comes to the backstitching.
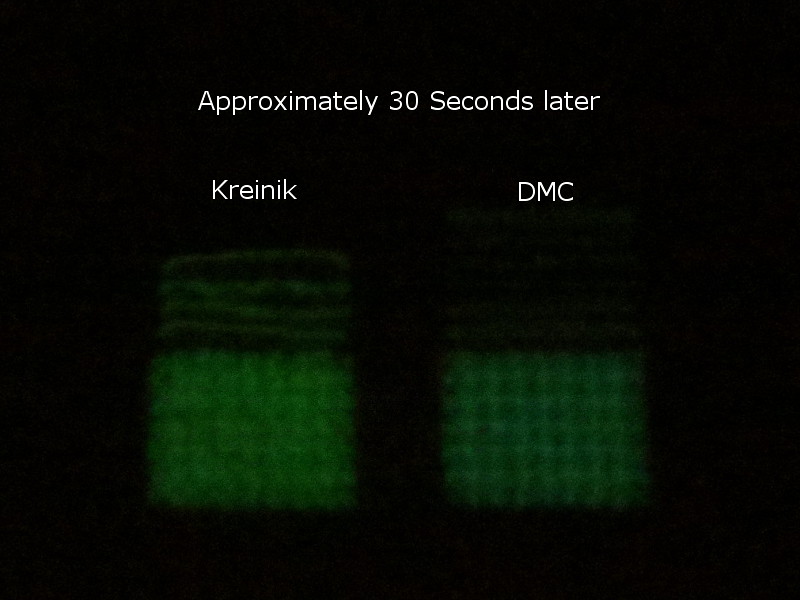
How well does the glow last over time? Here’s the glow after approximately 30 seconds:
and again after approximately 60 seconds:
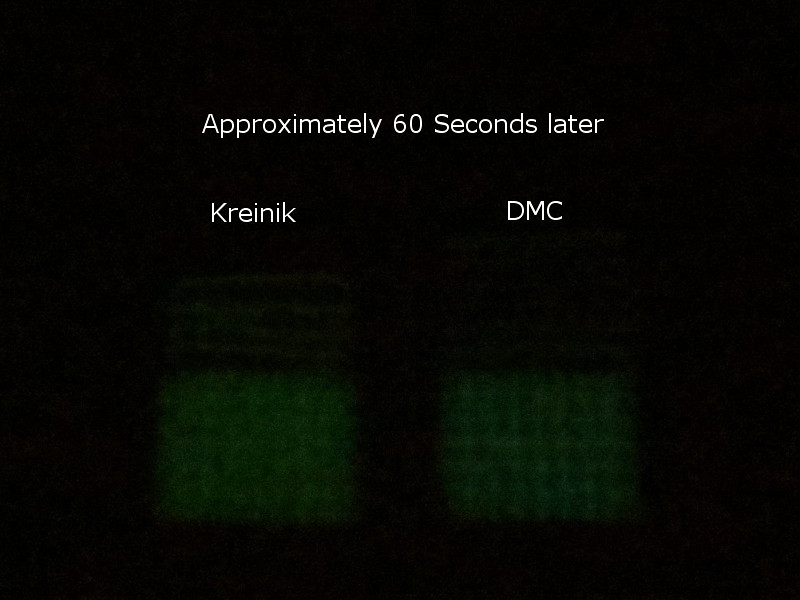
The two are just about equally effective. Please keep in mind that the glow after a minute is more detectable by the human eye than by my camera. The glow is easily seen for much longer than just one minute!
So, after all this review, what would I use? Well, if the white color of the thread in daylight was fine, and I was doing cross stitch or needlepoint in 14-18 count, I’d use the DMC. It really is that much easier to use in those applications. However, if I wanted the stitching to be a color other than white or I was using plastic canvas, I think the Kreinik would be my choice. I would also use the #8 and larger Kreinik Braids and Ribbons in embroidery as couched threads (you can read more about couching here and here).
The DMC is definitely designed to act like six-strand embroidery floss, whereas the Kreinik is designed for a wider range of applications. How both of them are used is up to your creative talents!
Have you used any of these DMC or Kreinik glow in the dark threads? How did you use them and what are your impressions?

Thank you for this fabulous review. It’s very helpful to see them all sampled as I have a project in mind and couldn’t decide which might work best
Thank you so much for this thorough review! It’s incredibly helpful.