 This NFL crib mobile tutorial is my contribution to this year’s Crafty Football Blog Hop! I’m generally known for my cross stitch and needlepoint projects but lately I’ve been noticing so many fun felt projects I wanted to give it a try. I also really enjoy the colors of the NFL teams – they’re bright and bold, perfect for crafting. Why not have felt and NFL colors join forces in three dimensions?
 This 2015 hop, like the 2013 and 2014 hops, is a combination of participants in the Crafty Fantasy Football League (#CraftyFFL) and fellow crafty and inventive football fans. At the bottom of this post, check out the links to the other participants outstanding projects!
Things you’ll need:
- felt
- embroidery floss
- an embroidery hoop (I used a 5″ x 9″ oval shaped hoop as it was close in appearance to the outline of a football)
- paperclips
- fabric scissors
- paper scissors
- pins
- cotton batting or cotton balls (optional)
- needles
- ruler
- small metal or wooden ring (optional)
- glue (school glue is fine)
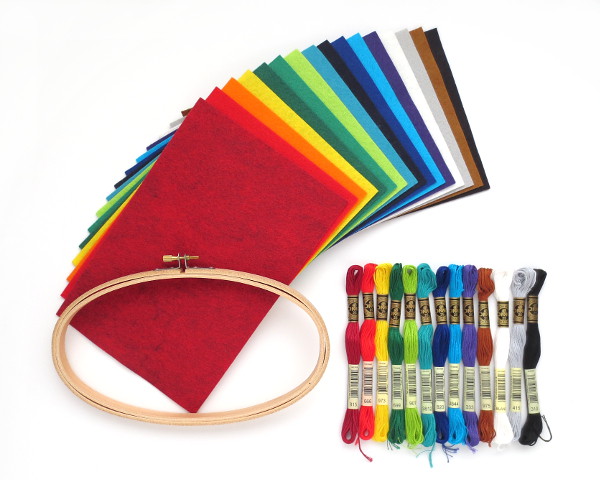
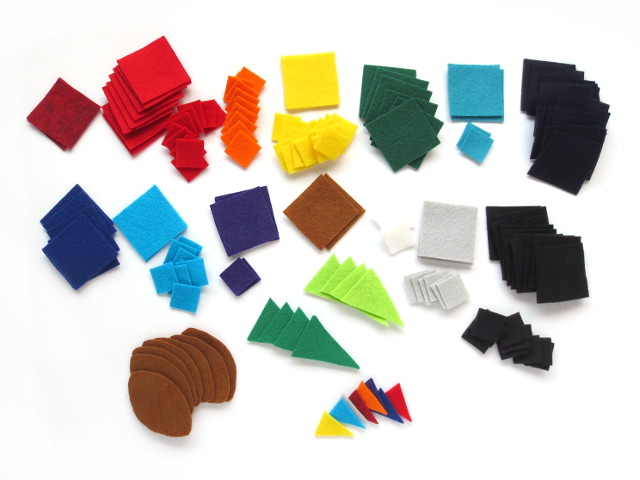
You will need 16 colors of felt and 13 colors of embroidery floss. The embroidery floss I already had in my supplies, but I purchased the felt and the hoop from the incredibly helpful Deanna of the (now closed) Etsy shop BusyLittleBird. She (and Mr. BusyLittleBird) went above and beyond when helping me get the correct colors of felt for this project and I can not thank her enough!
I recommended her listing for 20 sheets of 6″ x 9″ wool blend felt as that size sheet is big enough to accommodate all the cut pieces necessary of any color. I also recommended her listing for the 5″ x 9″ oval hoop, and in addition, she sold the DMC embroidery floss necessary to augment your collection.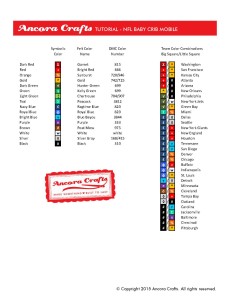 The legend at right shows the names of the felt colors (as they were listed at BusyLittleBird), the DMC floss numbers, and the team color combinations necessary for the mobile.
Note: It will take two whole skeins of floss to wrap the 5″ x 9″ hoop. Also, some of the colors in the photo above are different than the colors listed in the legend – a result of post-purchase consultations with BusyLittleBird. I recommend you go with the colors in the legend.
Cutting:
On the mobile, each of the 32 NFL teams are represented by a double-sided felt square. Each side consists of a big outer 1 1/2″ square and a small inner 3/4″ square.
Let’s use Denver (my fave team – Go Broncos!) as an example. The outer square is Ragtime Blue and the inner square is Sunburst. Therefore, for Denver’s double-sided square, you will need to cut two 1 1/2″ Ragtime Blue squares and two 3/4″ Sunburst squares. Repeat this for all the teams, and refer to the legend for all the color combinations.
I used fabric scissors to cut the squares, although a fabric cutting machine or a rotary fabric cutter probably would have worked much better at getting the edges of the squares at precise right angles.
Next up are the 4 pennants and the 4 footballs, and here is a template of those shapes for you to use.
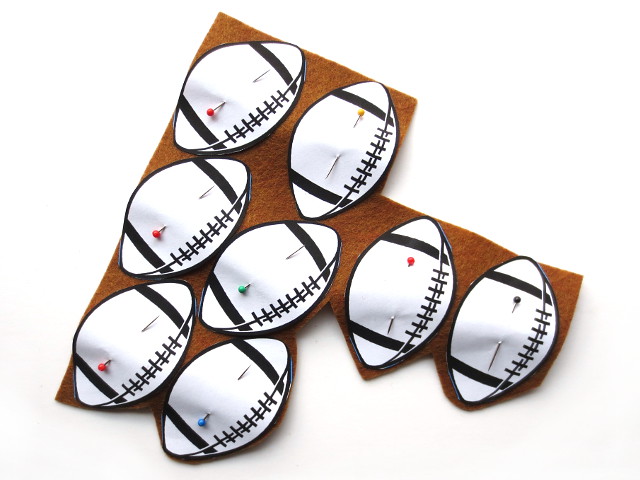
For the footballs, cut out the eight paper templates and pin them to the Peat Moss felt. You may want to do a rough cut to separate the pieces from each other, and then go back and more carefully cut around the edge of the paper football template.
For the pennants, cut four big triangles of Kelly Green felt and another four of Chartreuse felt. You may want to pin the big outer triangle templates to the green felt in the same manner as the footballs before you make your cuts. The eight small triangles can be cut from scraps of the other felt colors.
After all the cutting, you can unpin the templates from the felt and discard the paper. You may need to trim a few pieces to get them a little more correct.
When you have finished cutting, in total you will end up with 64 big squares, 64 little squares, 8 footballs, 8 big triangles and 8 small triangles.
Sewing:
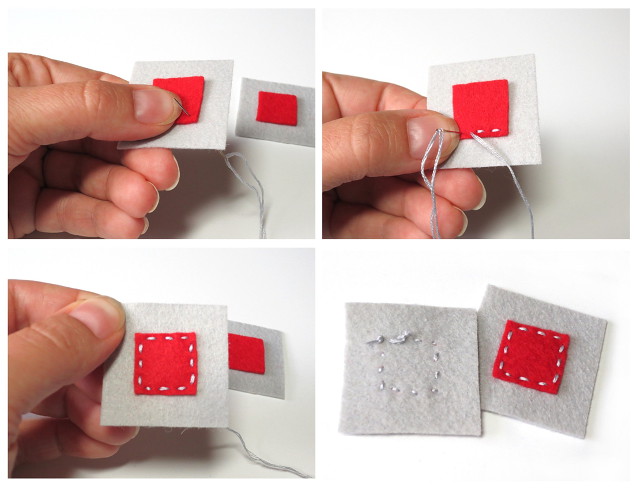
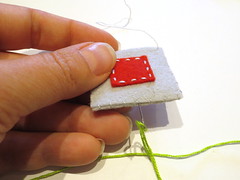
Use three strands of the six strand embroidery floss to sew the small inner squares to the middle of the big outer squares. Use the floss color that matches the bigger felt square. Refer to the legend once again to get your team color combinations correct. The photos below show Tampa Bay’s silver and red sewn with the silver floss.
Make a knot on the end of the floss, and come up from the back about 1/8″ from the corner of the inner square. Make a simple running stitch all the way around, and then tie off the floss with a knot on the back. Repeat this process for all 64 squares.
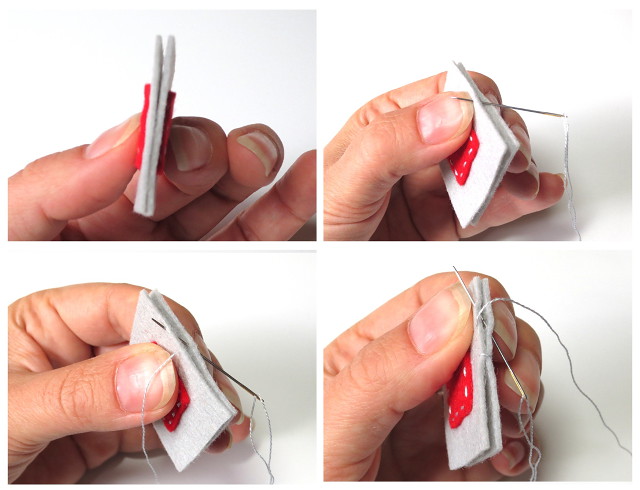
Put the two halves together back to back, with the knots on the inside. This time use only one strand of that same bigger square floss color. Make a small knot at the end of the floss. Starting at the middle of the top, whip stitch the two pieces together. The photos below show the basics of the whip stitch, but here is another set of directions you might find useful.
Stop whip stitching at the fourth corner, leaving half of the top unsewn and open as shown in the photo below. Leave roughly 4 – 5 inches of the single strand of floss so that you can finish whip stitching the top later. Repeat this process for all 32 squares. 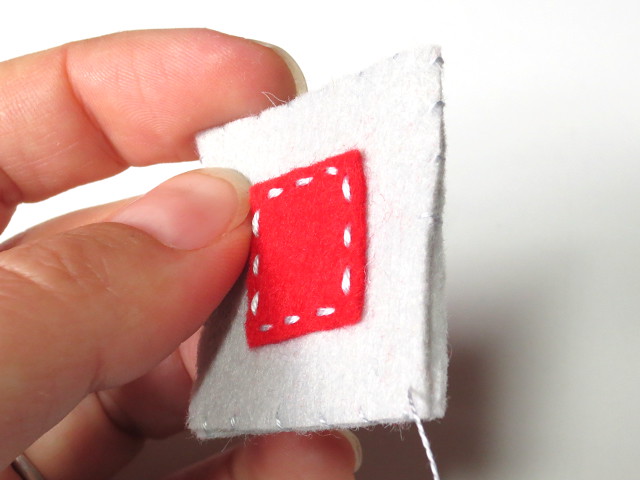
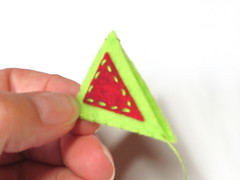 Repeat the same steps for the pennants. Sew the small triangles onto the big triangles with three strands of floss. Put the two pieces back to back, and whip stitch the pennants, again using one strand of floss. However this time, leave the entire top edge of the pennants open.
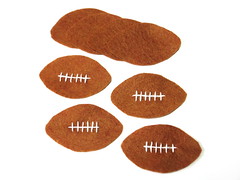 Use three strands of white embroidery floss to sew laces on four of the eight footballs. Whip stitch one “laced” football to a plain football. This time, leave roughly 1 1/2 inch around the top center open and unsewn. At this point, you can stuff the footballs with cotton batting or even cotton balls to give them a little dimension.
When all of your pieces have been whip stitched, layout all the pieces into 8 columns of 5 pieces. Put one pennant or football in each column. Try to balance the position of brighter squares and darker squares, and try to avoid duplicate color combinations (I’m looking at you navy blue and red, for one) being adjacent to each other.
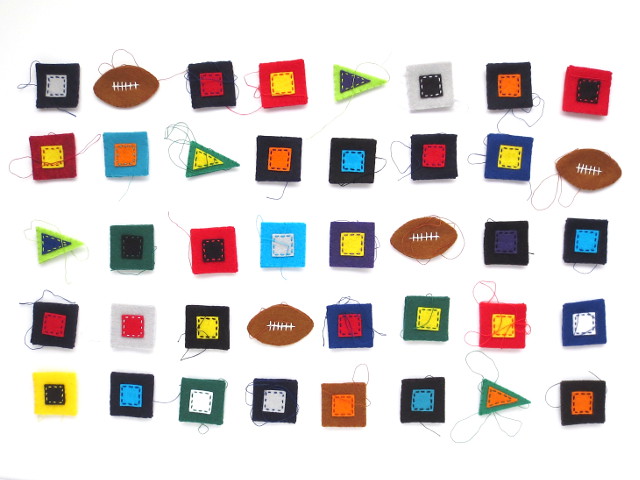
One note, do not put a pennant at the bottom of a string like I have shown above. I found out that those little puppies won’t hang straight unless there is a square or football below them.
Assembling the Strings:
For this step, you will need another needle that is at least as long as the squares are tall – 1 1/2 inches. I alternated between the two green floss colors, DMC 699 and DMC 704, to make the strings. Cut pieces of floss 30″ – 36″ long and separate them into two three-strand groups. Thread your long needle with one of these three strand groups of floss.
You’re going to start from the bottom piece and work your way up each string of five pieces.
Double or triple tie a paperclip to the end of the floss. Trim the tail end of the floss quite close to the paperclip. Insert the paperclip into the unstiched gap in the square. Orient the paperclip vertically, and center the top of the paperclip and the floss at the top center of the square. Make sure that the tail end of the green floss is tucked inside the square.
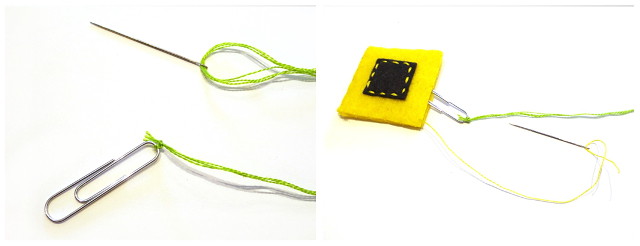
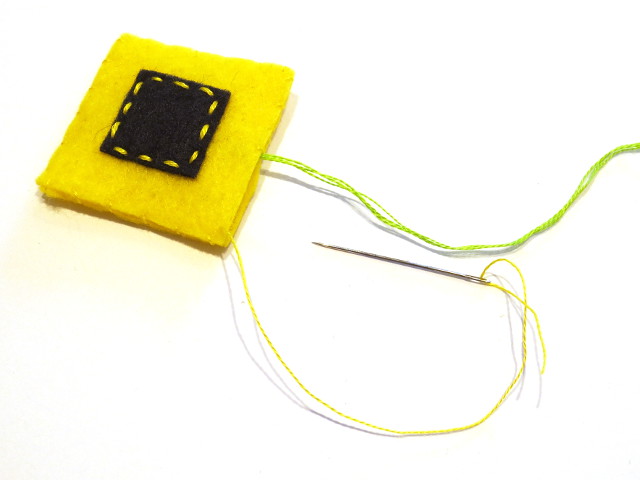
Thread your smaller needle with the tail of the floss you used to whip stitch the two pieces together. Whip stitch the top of the square closed, making sure you stitch on either side of the green floss four or five times to secure the paperclip.
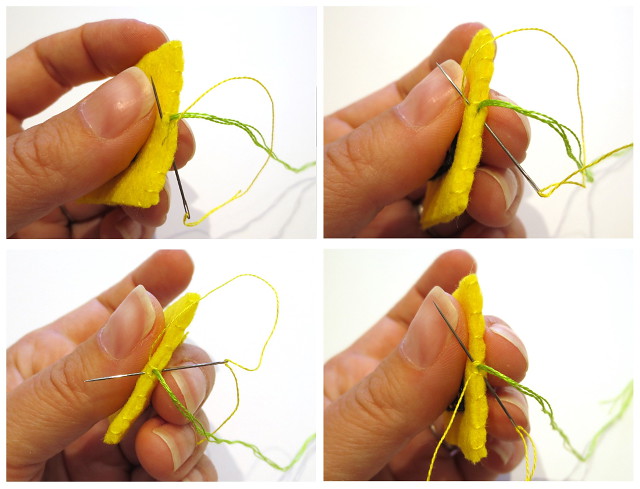
As this mobile isn’t meant for much handling, no knot is necessary. Just draw the thread out through an edge of the square between the two pieces of felt and trim it close.
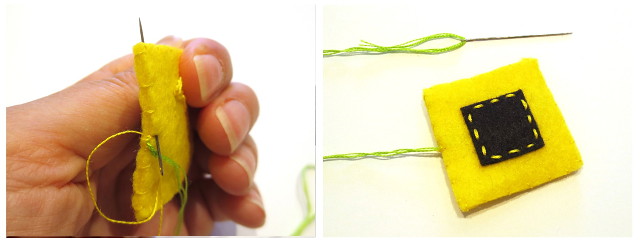
 If your next piece is a square or a football, insert the long needle through the bottom center between the two back-to-back pieces. Work the needle toward the top center, making sure you don’t accidentally pierce either of the two sides. Pull the long needle through the top of the piece.
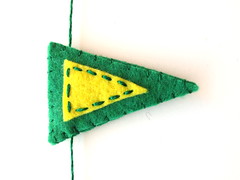 If your next piece is a pennant, run the needle between the pieces roughly in the same location as the base of the small triangle.
Now you will want to look at the spacing between pieces on the string. In my example, I put about two inches between pieces. Tie another paperclip to the green floss where the top of the next piece will be. For example, if the next piece is a square, the knot on the paperclip would be 3 1/2 inches (2 inches spacing plus the 1 1/2 inch of the square) above the top of the piece below it. Using a ruler will definitely help your spacing.
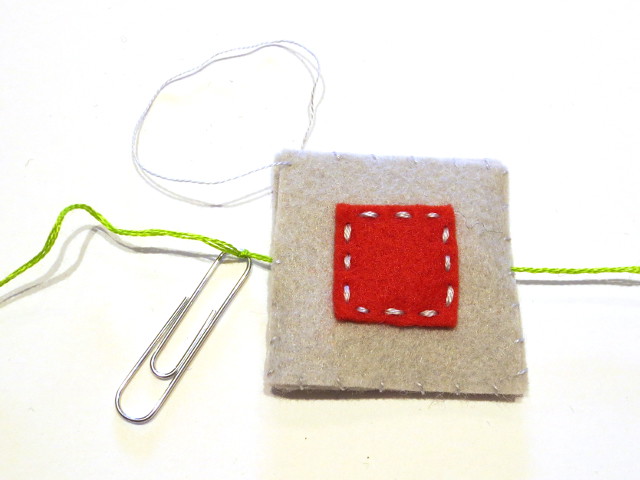
After you get your paperclip knotted in place, insert the paperclip into the unstitched gap and finish whip stitching the piece in the same manner as you did with the first piece on the string. Again, make sure you stitch on either side of the green floss four or five times to secure the paperclip inside the piece.
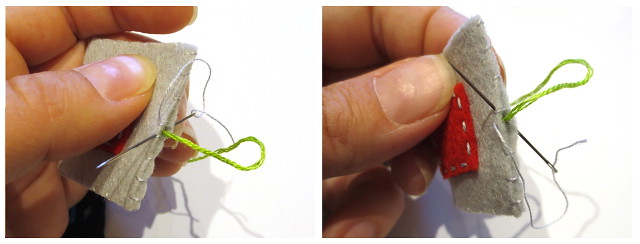
Repeat these steps until all five pieces are on a string, and all eight strings are assembled.
Assembling the mobile:
All you will use is the smaller, inner embroidery hoop. Mark 8 equidistant places on the hoop, and then tie the 8 strings to the hoop using secure knots. You can tie the eight strings all at the same height or stagger the heights as I did. You should have plenty of extra string – don’t trim the excess yet!
Take three of the eight excess strings (I chose the strings at roughly the 12:00, 4:00 and 7:00 positions), and tie them together above the mobile so that the hoop will hang level. At this point you could attach a metal or wooden ring. I didn’t have one available, so I just made a second knot about an inch above the first knot.
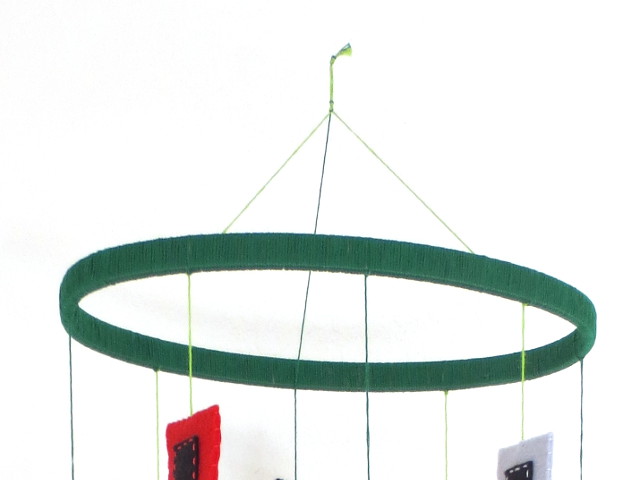
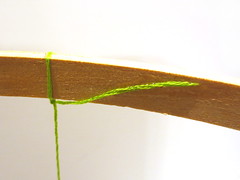 Trim the five other excess strings down to a length of about 1 1/2″ and then use a little glue to stick the floss ends to the inside of the hoop.
Now you’re ready to start wrapping your hoop. It will take two whole skeins of floss, using all six strands, to wrap a 5″ x 9″ hoop. Use a little more glue to stick the beginning of the skein to the hoop. Work your way over that beginning and continue wrapping the floss around the hoop. Take care that you don’t catch up the eight strings below or the three strings that go up to the knot.
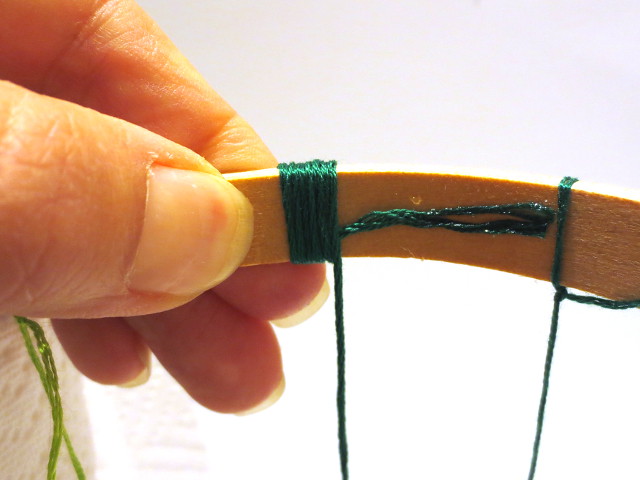
Tip: Holding the hoop with all the strings attached and bobbing around while you’re trying to wrap the floss is nearly impossible. On my table I used a couple of new rolls of paper towels standing on end to assist me in holding up the hoop. Putting a big rubber band around each roll helped as well.
 To tie off a skein, thread a needle with the floss, pass it under as many wraps as possible on the inside of the hoop, and then closely trim off the extra. After you tie off, you may need to scoot and shift a couple of wraps to cover some small gaps that show the wood hoop.
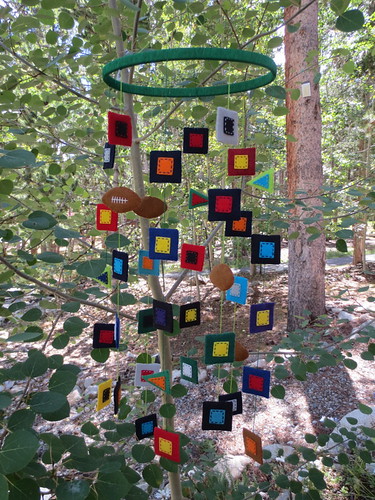
Congratulations – your mobile is complete! Here is mine, hanging out with some aspen leaves.
Check out what the other Crafty Football Blog Hop participants made this year!

